

Creating a Board & Batten Basement Stairway
When we first bought our house, we had a budget for making updates before moving in. We asked the contractor to itemize the costs of all the projects on our wish list and then brutally cut out everything but the necessities. As such, the basement became “Part 2,” which was somewhat unfortunate since it is probably the most dated portion of the house. For my 2021 New Year’s resolution, I started updating projects around the house. I knew it wouldn’t happen quickly between work, kids, and life, but any progress was better than no progress!
Despite the January resolution , I didn’t start until April. I had been battling a pretty severe return of my depression. I knew it was back before COVID, but with lockdowns and virtual schooling while working from home—or living from work—I operated in survival mode for over a year. After finding a new doctor and getting on the proper medication, in April, I finally felt motivated enough to tackle my first project – the basement stairwell.
Things I planned to do:
Rip off old, dirty grasscloth wallpaper
Paint walls

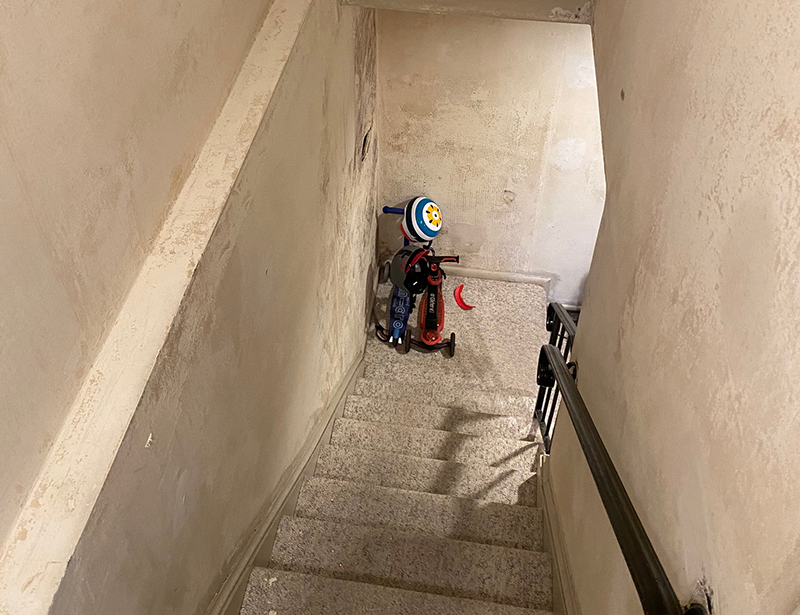
Like all good projects, this short list was short-lived. As soon as I ripped off the wallpaper, I could see why the walls were covered up to begin with. There were huge holes in the walls in several places, and one part of the wall had mold. Ugh. I thoroughly cleaned up the moldy area with diluted bleach and started looking for ways to salvage the wall.
While scouring the internet, I found a post on the Newly Woodwards blog on using square board and batten to hide damaged walls. Bingo! Their stairs even looked like mine, so it was easy to visualize the space. I watched many YouTube tutorials and found Instagram DIY accounts with people building board and batten.
In the meantime, I removed the wallpaper paste and made an epic mess. Initially, I tried to use a mixture of vinegar and warm water. My Google searches said this would work. It did not. Maybe that’s ok for removing paste that’s been up for less than four decades, but it was not enough here. Eventually, I tried WP Chomp Wallpaper Stripper. It worked so quickly and beautifully I almost cried after days of trying to soak, scrape, soak, sand, repeat. During one of my sanding attempts, I forgot to close the two doors at the top and bottom of the stairs and had dust ALL over the house. More tears.
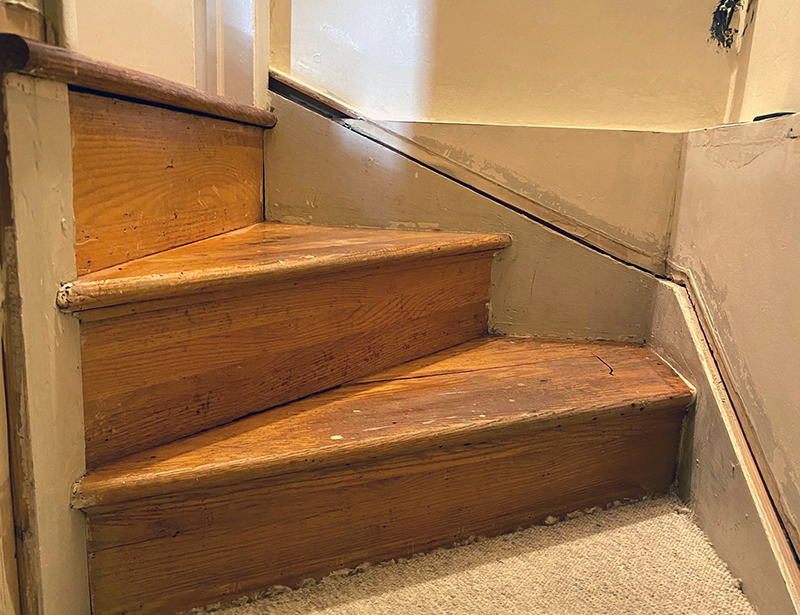
At some point during a wall-scraping session, I noticed some of the carpet was starting to come loose at the top of the stairs. We were already planning to replace the carpet, but I wanted to finish the scraping and sanding so that I wouldn’t immediately ruin anything new we put down. So I pulled back the carpet a bit and found hardwood stairs underneath. They weren’t pretty, but they also didn’t look too terrible—time to rip up the carpet.
My husband was a good sport about all this. His home office is in the basement, and every time he opened the door, it must have seemed like some portal into a new hell. After I’d ripped off the wallpaper, he said, “well, we live in a murder house now.” When I started ripping up carpet, he just asked, “what is happening?” Otherwise, he left me to my crazy plans.
The stairs had a previous varnish and then glue on them. I first tried simply sanding it off, but nothing was happening, even with course sandpaper. I tried CitriStrip and Smart Strip Paint Remover. The varnish came off much better with the Smart Strip. It took me a whole weekend and several coats, but I got the varnish off the stairs and about 5 layers of paint off the trim.
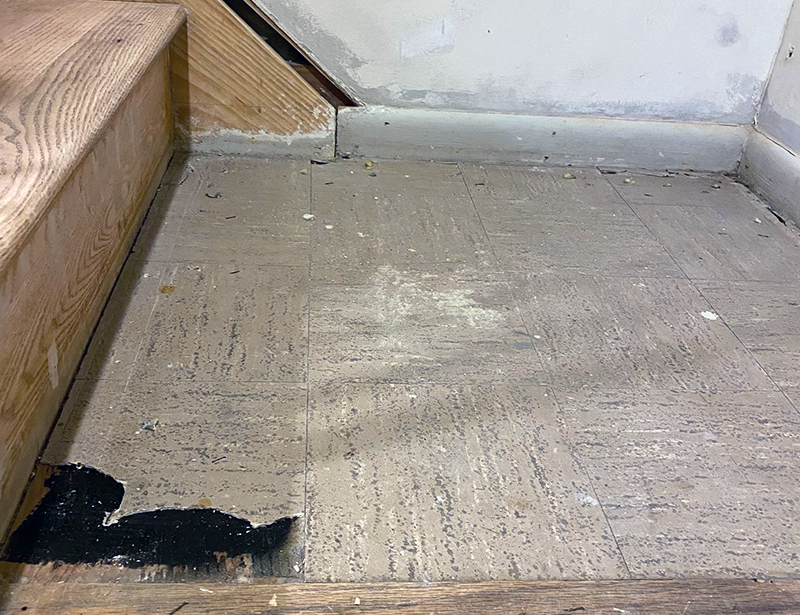
I’d been holding off on the bottom landing tread because when I started pulling the carpet up, I saw some sort of weird tile on top of the wood. I got to the point where I had to deal with that step to move forward. After pulling off the carpet, I tried to remove the tile, but it wasn’t coming up, and the parts I could chip off had black glue underneath that wasn’t sanding off easily. Luckily a friend of mine had a contractor out at her house that she loved and recommended him to me. Juan came out and said he’d need to rebuild the stairs. He also said I needed to replace at least a portion of the drywall because there was mold behind the holes. That weekend, he came out and pulled out the moldy drywall, replaced it, and built a new step. At that point, I probably didn’t need to do the board and batten anymore since we had replaced the damaged walls, but now I had my heart set on that look.

I did one final round of filling in holes I’d missed and sanding the walls. Since there had been some mold, I used KILZ Mold and Mildew Primer on the walls before painting. The space was narrow and dark, so I wanted a crisp, white wall and ceiling. I should have known this after years of graphic design, but it never occurred to me how many colors of white there were. I didn’t want a cream or yellow undertone. I brought home a ton of samples and chose the Behr Bakery Box. I know people feel all sorts of ways about Behr paint. When we had the house painted before moving in, we used Behr samples to choose our colors. The contractor we used said we should use a higher-end paint with a flat finish for a more modern look. I wish I’d looked into finishes more because I absolutely would NOT have done that. The kids have left so many handprints on the walls. No amount of scrubbing gets them off. Since the basement stairs are a high-traffic area, I opted to go lower cost/easier to redo if needed. I bought a gallon of eggshell Behr Marquee in Bakery Box and called it a day. I don’t know whether it would have been better to build the board and batten wall first or paint the other parts, but I opted to paint first. It looked so much better already.
Once the new landing was in place, I filled the holes from the carpet staples with DAP Plastic Wood-X. I like that it goes on pink and then dries a natural color. I need to improve at timing things, so having the visual is helpful. After it dried, I carefully sanded it off and used a rag dipped in acetone to make sure there wasn’t any varnish stripper left on the wood. We have a lot of mahogany-stained furniture throughout our home, and I love the rich color. I purchased the Varthane Poly + Stain in mahogany, assuming that cutting out a step would be beneficial. I’ve since decided that staining and applying polyurethane coats is infinitely easier than working with this product, but this is certainly a “live and learn” situation. With the poly + stain in one, you must work very quickly to get the color on and the excess wiped off as it dries quickly. It gets tacky and creates spots if you don’t wipe it off fast enough. I worked in small sections to prevent streaks, but then it looked a bit blotchy in some places. I painted the risers with the Behr Ultra Scuff Defense Interior Semi-Gloss in Ultra Pure White. I made a mistake there and didn’t prime the wood. Since the paint can said primer + paint, I figured it was good to go. Because I didn’t prime the risers, the tannins in the wood started making the finish streaky almost right away in some areas. I’ve since learned about Zinsser B-I-N primer for such jobs, but not in time for this one.
Board and batten weekend finally arrived. I headed to Home Depot to get:
In my ignorance, I assumed I could cut the hardboard with the semi-circular blade of my multitool and use my miter box and saw for the boards. The miter box wasn’t too bad, but it was slow. It also didn’t work when I got to the angled boards since none were at a 45 or 22.5-degree angle. I got a Makita handheld circular saw to finish the job.

In all the DIY tutorials, people kept saying you needed to use the boards to cover the seams in the hardboard. The way I had drawn it out for my draft did not have the seams covered up. Once I had the hardboard glued and nailed to the wall, I could see why the seams needed to be covered. Even being put as close together as possible, there were still gaps that would be difficult to cover, and of course the walls weren’t straight. Since the end of the first hardboard lined up reasonably well with the end of the ledge, I opted to start there with my first vertical board, then go back to the right and put the second board along the wall. The other vertical boards going up the stairs match that spacing. For me, that ended up being 30 inches.

Once the boards were up, I decided I wanted a finishing top piece to cover the ledge and the top of the whitewood boards. I couldn’t find what I needed at the store, so I ordered a 2-pack of 1 x 6 x 6 red oak boards and had them delivered. I also needed cove moulding for finishing work that I couldn’t fit in our cars, so I had that delivered at the same time. While waiting for the oak boards and cove moulding to arrive, I filled in the nail holes and used caulk to cover gaps between the boards and the hardboard panels. A quick sand to smooth everything out and I primed and painted the board and batten wall. I used the Behr Ultra Scuff Defense Interior Semi-Gloss again, but this time with the Behr Kitchen, Bath, and Trim Primer & Sealer.
With the ledge in, I installed some finishing details like the wall sconce, Nest Protect smoke and CO alarm, and Rustic Wood Floating Shelves from Pottery Barn. I can’t find the video I used to walk me through changing the wall sconce. The woman did a great job explaining what needed to happen, which was fantastic because the instructions the light came with were abysmal. If I come across it again, I’ll be sure to link it here.
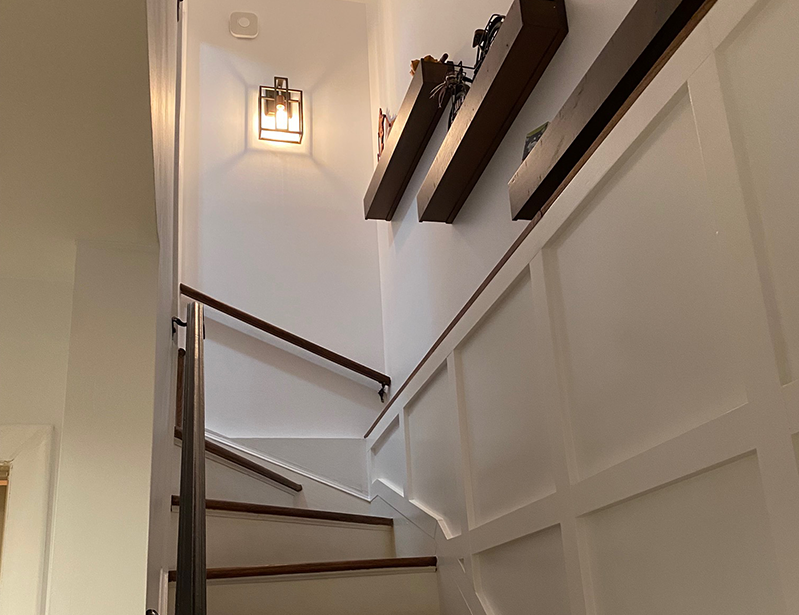
I’ll get back to the rest of the basement eventually, but for now it makes me happy to look at this beautiful wall every time I walk down the stairs.
*Post may contain affiliate links. See the Disclosure page for full details.