

IKEA Hacked Home Office

When we moved into this house, G was about to turn 2. We turned the breakfast nook into a play room for him so we could keep an eye on him while cooking. With one kid, it worked great. He had a train table and kept himself busy building a million different railway combinations. One additional kid and lots of stuff later, the play room was basically a junk room. The boys didn’t even play in there, they just grabbed toys and headed to the living room to spread out.
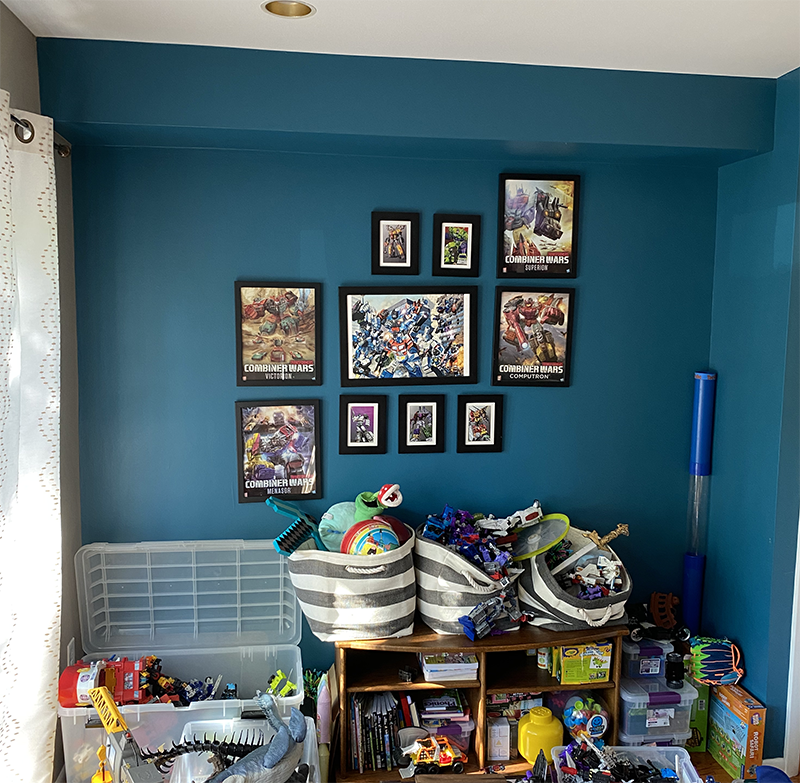
Pre-COVID, I was the only one with telework flexibility, so it didn’t matter if Will and I both shared the basement as our “office” space. Then March 2020 rolled around and we all got smooshed together. Virtual learning became our reality and one parent generally needed to sit upstairs and resolve technical difficulties or meltdowns. We had often talked about turning the front room into something else and as remote work continued, making it my home office seemed like a useful transition.
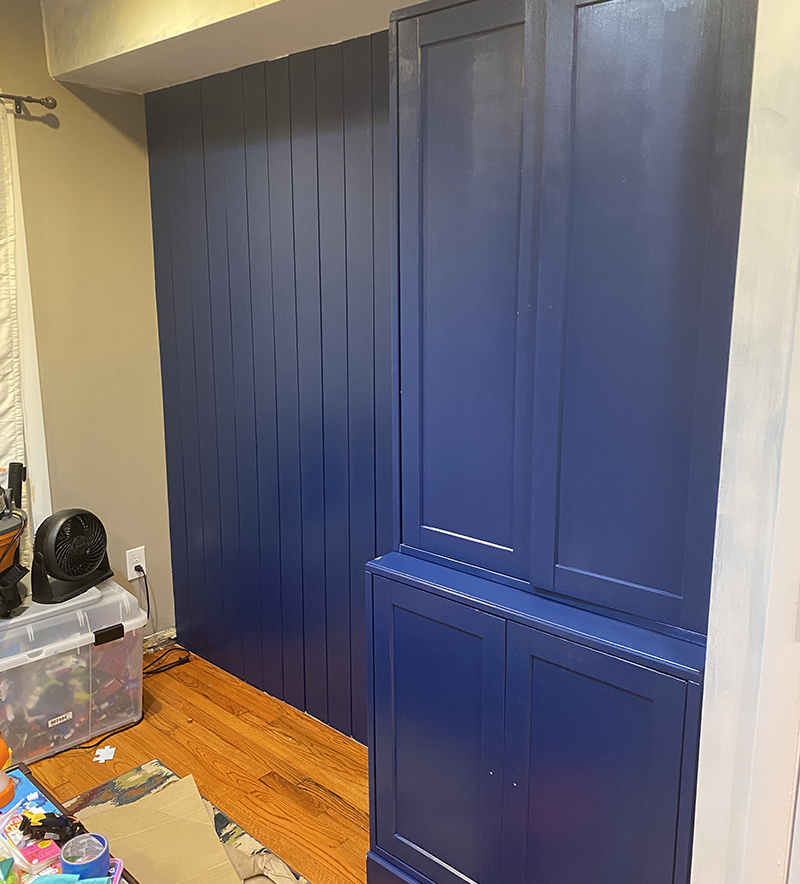
I was limited in height by a soffit with ductwork running through it and the sliding door on the left. Because of the slider, I only had 19” of depth to work with, so any sort of base cabinet would be an immediate no-go. I was looking at wall cabinets when a friend of mine suggested using IKEA’s PAX closet system, but the sizing still wasn’t quite right. That prompted me to look around at some of their other cabinets. The HAVSTA line was a perfect fit. I opted for one shelving unit and one storage combination cabinet with base. You can mix and match the line quite a bit, but this gave me a good amount of storage while still fitting within my space constraints.

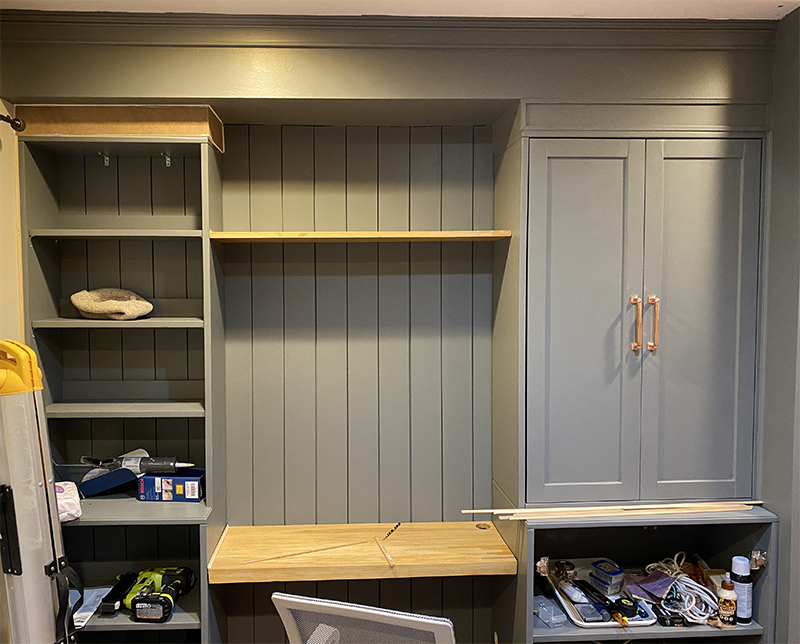
I had a number of inspo pictures saved and really liked the addition of shiplap to give some height, so I started there. To keep the backing consistent behind the shelving unit, I started at the left wall and installed the shiplap boards until a little beyond where the combination cabinet would go. I’d watched enough videos to know that I needed to paint the gaps as I went to avoid having to use a mini paintbrush later. I put together the combination cabinet and went to work on painting. I lightly sanded and applied the Zinsser B-I-N primer. I had visions of a beautiful navy and copper color scheme, but once it went on, I hated the navy paint. Even with multiple coats, it was streaky and the color was inconsistent. I was frustrated and didn’t want to start over, but I also couldn’t imagine sitting in a space 40+ hours a week and loathing it. Much sanding and priming later, I landed on Coastal Storm for a new color and I absolutely love it. It’s the perfect mix of calming and moody. Unfortunately for me, since I had changed up the paint color late in the game, I ended up having to go in with a tiny paintbrush and repaint all those shiplap gaps after all.

I built small boxes to close the gap between the HAVSTA pieces and the soffit and screwed them in to the bottom of the cabinets. I put trim around the edges to give it a nicer finish and then got to spend a lot of time doing my least favorite thing – caulking. It doesn’t matter how many tips I try, caulk and I do not get along. Too bad it’s what gives everything a nice finished look.
The finishing touch was hardware. I replaced the IKEA knobs with copper cabinet knobs and pulls from Rejuvenation.
Next, I needed wood for my desktop and a shelf. I knew Home Depot didn’t have boards that were wide enough, so I went to a local lumber yard to see if they had any larger slabs. No dice. If I had looked around more, I may have been able to find someone somewhere who had the size wood I wanted, but I just opted to use a Kreg jig to make pocket holes and screw boards together. In keeping with the coastal theme, I used a weathered oak stain, but it was too blue. During the day it looked ok, but at night it matched the cabinets. Back to sanding…Summer Oak stain became the final color. I then screwed into the shelves from the inside of the cabinet and shelving unit. As a last step to make the cabinets look built-in, I added quarter round moulding along the bottom, caulked, and painted it to match.
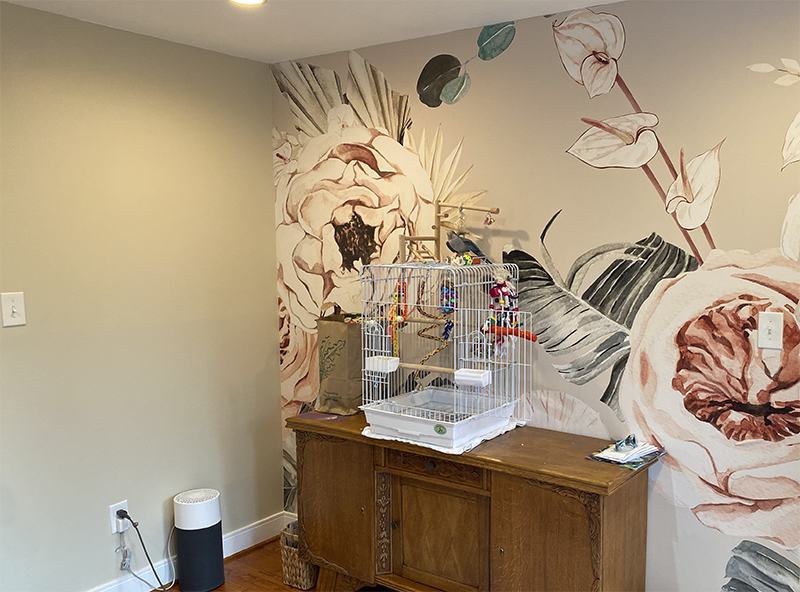
I decided to find a wallpaper for an accent wall behind me. Need a nice Zoom background for WFH after all! Since both my boys are May babies, the peonies that bloom during that time are special to me. The Terracotta Blooms mural from Wallblush was gorgeous and matched the colors perfectly. Whew! Peel and stick wallpaper is no joke.

Finally, I replaced the baseboards with something more modern. I wanted something with clean lines but with a little more visual interest than just the plain craftsman baseboard. I had found what I wanted on the Home Depot website, but the product was always out of stock. Even when I happened to catch it in stock, it would be sold out before I managed to input my payment information. One morning I checked on a whim and managed to check out fast enough to get some sent my way. I ordered extra so I could use it in the basement as well.
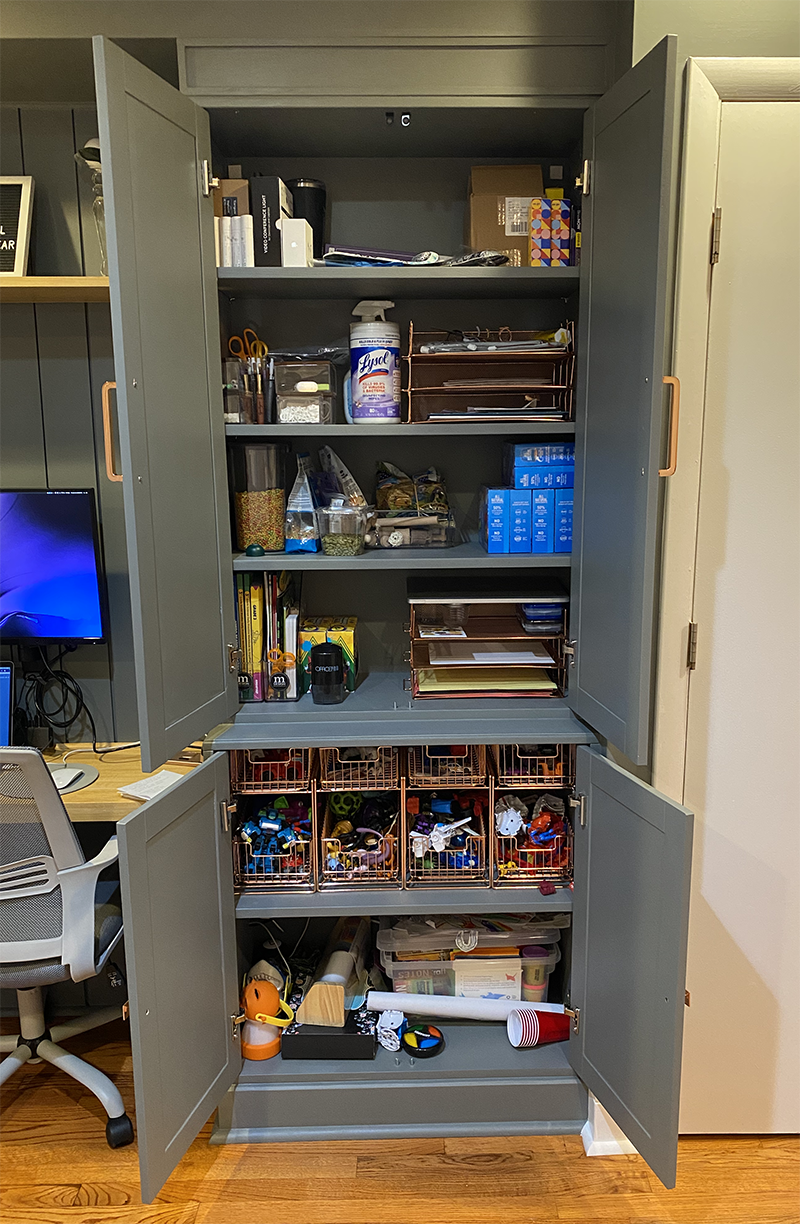
Here we are! It’s nice to have my own space plus more room to hide toys and papers that I need to keep but don’t know what to do with. For organization, I used:
Pull-out Organizers (The exact ones I ordered are no longer in stock, but these are very close.)
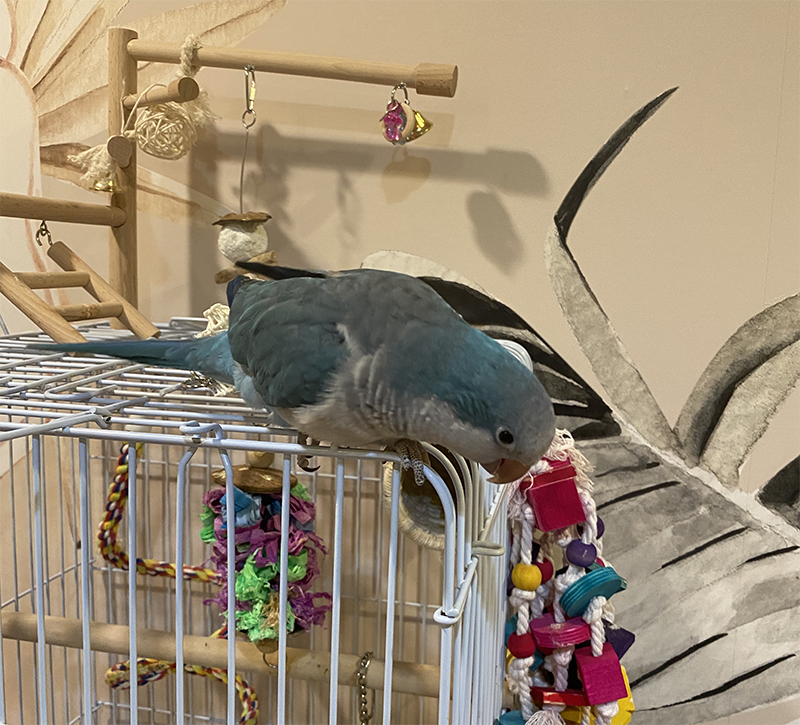
The boys gifted me a Quaker parrot for my birthday and he lives in the office with me. Pippin is a great coworker, even if he does make a huge mess and laughs at my ideas in meetings.
Update: Since my original writing, I’ve upgraded my chair to a Herman Miller Zeph and added a picture light above my computer. I love that the light has different settings and doesn’t require any electrical work.